Getting started with fastlane for iOS
Setup Xcode for fastlane
Xcode command line tools (macOS)
xcode-select --install
Installing fastlane
fastlane can be installed in multiple ways. The preferred method is with Bundler. fastlane can also be installed directly through Homebrew (if on macOS). It is possible to use macOS's system Ruby, but it's not recommended, as it can be hard to manage dependencies and cause conflicts.
Managed Ruby environment + Bundler (macOS/Linux/Windows)
Ruby
If you use macOS, system Ruby is not recommended. There are a variety of ways to install Ruby without having to modify your system environment. For macOS and Linux, rbenv is one of the most popular ways to manage your Ruby environment.
fastlane supports Ruby versions 2.5 or newer. Verify which Ruby version you're using:
$ ruby --version
ruby 2.7.2p137 (2020-10-01 revision 5445e04352) [x86_64-darwin19]
Bundler
It is recommended that you use Bundler and Gemfile to define your dependency on fastlane. This will clearly define the fastlane version to be used and its dependencies, and will also speed up fastlane execution.
- Install Bundler by running
gem install bundler - Create a
./Gemfilein the root directory of your project with the content
source "https://rubygems.org"

gem "fastlane"
- Run
bundle updateand add both the./Gemfileand the./Gemfile.lockto version control - Every time you run fastlane, use
bundle exec fastlane [lane] - On your CI, add
bundle installas your first build step - To update fastlane, just run
bundle update fastlane
Homebrew (macOS)
This way, you don't have to install Ruby separately, and instead homebrew installs the adequate Ruby version for fastlane. See this page for details.
brew install fastlane
System Ruby + RubyGems (macOS/Linux/Windows)
This is not recommended for your local environment, but you can still install fastlane to system Ruby's environment. Using sudo often occurs unwanted results later due to file permission and makes managing your environment harder.
sudo gem install fastlane
Setting up fastlane
Navigate your terminal to your project's directory and run
fastlane init
Note that if you want to create your first app on your App Store Connect account, you need to set the developer name (company_name) with PRODUCE_COMPANY_NAME environment variable:
PRODUCE_COMPANY_NAME="YOUR COMPANY NAME" fastlane init
To get more information check company_name description in the Create app documentation.
To have your Fastfile configuration written in Swift (Beta)
fastlane init swift
Swift setup is still in beta. See Fastlane.swift docs for more information.
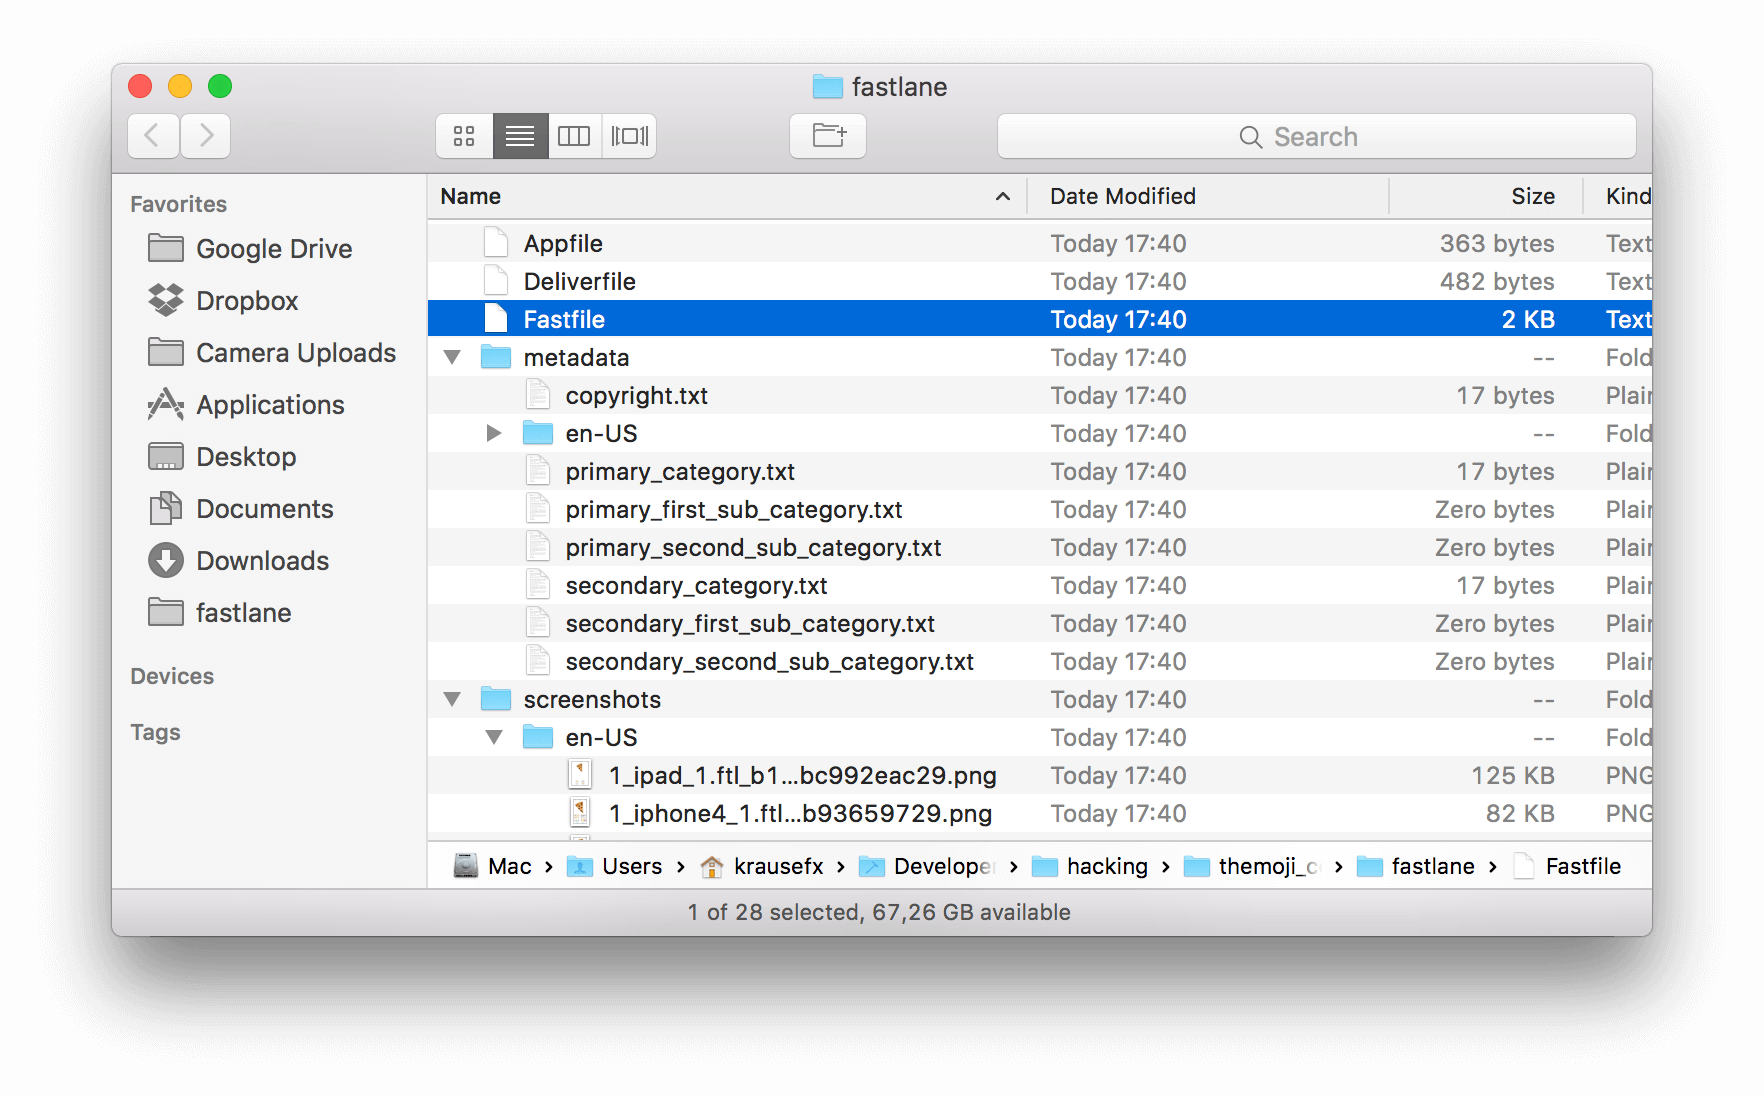
Depending on what kind of setup you choose, different files will be set up for you. If you chose to download the existing app metadata, you'll end up with new folders that look like this:

The most interesting file is fastlane/Fastfile, which contains all the information that is needed to distribute your app.
What's next?
fastlane created all the required files for you. Now you can go ahead and customise fastlane to generate screenshots, or automatically distribute new builds, and much, much more. Here are some examples:
- Generate localized iOS screenshots for the App Store
- Automatic iOS Beta deployment
- Automatic iOS App Store deployment
- Discover all fastlane actions
Do note that if the automation you're building requires connectivity with Apple's servers, such as for code signing when building your app, or uploading your app to the App Store Connect, and so on, you will need to authenticate. Check out Authenticating with Apple services to learn the best ways to authenticate, catered for your specific use case.
Set up environment variables
fastlane requires some environment variables set up to run correctly. In particular, having your locale not set to a UTF-8 locale will cause issues with building and uploading your build. In your shell profile add the following lines:
export LC_ALL=en_US.UTF-8
export LANG=en_US.UTF-8
You can find your shell profile at ~/.bashrc, ~/.bash_profile, ~/.profile or ~/.zshrc depending on your system.
Use a Gemfile
It is recommended that you use a Gemfile to define your dependency on fastlane. This will clearly define the used fastlane version, and its dependencies, and will also speed up using fastlane.
- Create a
./Gemfilein the root directory of your project with the content
source "https://rubygems.org"

gem "fastlane"
- Run
[sudo] bundle updateand add both the./Gemfileand the./Gemfile.lockto version control - Every time you run fastlane, use
bundle exec fastlane [lane] - On your CI, add
[sudo] bundle installas your first build step - To update fastlane, just run
[sudo] bundle update fastlane